Fire can provide warmth in freezing temperatures, protection from dangerous wildlife, a way to cook meals, and a centerpiece to gather around with friends and family, sharing stories, songs, many laughs, and great conversation. Fire is certainly not a toy, though, and safety is always paramount, especially in the summer months, as conditions get drier and hotter.
There are four important steps to follow when building a campfire: preparation, building, maintenance, and extinguishing the fire. Each step is equally vital to the process of safely enjoying a campfire – miss just one detail and your plans could go up in smoke—or worse.
How to Prepare a Campfire
As with all things in life, preparation can make or break everything. The first thing anyone planning to build a campfire should do is check with local fire restrictions. This information can likely be found on your county’s website, and will tell you if conditions are too dangerous for a fire. Always follow local laws and restrictions and ake sure to check with the campground for any other guidelines.
You’ll also need a shovel, a bucket, access to a water supply, and your preferred method of starting a fire.
Choose Your Location
Choosing the right place to build your campfire can be just as crucial as any other step in the process. If you’re at a campsite or somewhere else with a premade fire pit, use it! If not, you’ll have to build your own. Make sure there’s at least 15 feet between your chosen site and anything flammable, like trees, bushes, and tents. The best spot to start building a fire is dry, bare dirt—if you don’t have that, clear out all debris in a 10-foot radius. Other things to consider include low hanging branches, wind speed and direction, and rain.
Once you’ve picked out your spot you can start working on your fire pit. Using your shovel, dig a hole in the ground about a foot deep. Gather large rocks and make a ring around your hole with them to act as a firewall. Now that you’ve got somewhere to put your fire, you just need the materials to build it.
Campire Materials
Fire needs three things to survive: heat, oxygen, and fuel. If you’re building a campfire you should already be outside, so oxygen is the easy part. Heat is something you’ll have to provide, and that can come in the form of a lighter, matches, or good old-fashioned friction. That leaves fuel. For a campfire, fuel usually means wood. If you plan on keeping your fire burning for any time at all you’re going to need a lot of it, but there are some things you should know before you start running around the forest gathering the biggest logs you can find.
3 Types of Firewood to Use
There are three different types of firewood, and you’ll need plenty of each to get your fire burning strong.
-
The first type of firewood is tinder, and sometimes it’s not even wood at all. Tinder is the part you’ll light first to get your fire started, so it can be anything that catches fire and burns quickly and easily, from dry leaves and grass to moss, bark, or small twigs. If you’re worried about finding dry tinder at your campsite, or if you just love planning ahead, you can bring things from home to use as tinder—like old newspaper, cardboard, wood shavings, or dryer lint.
-
The second type of firewood you’ll need is kindling. These are small sticks that you will use to build the starting shape of your campfire. Serving to bridge the gap between a tiny bundle of burning tinder and a raging inferno, kindling needs to be able to catch fire easily and keep burning for a while, so make sure to keep them to about an inch around.
-
The third and final type of wood needed for a campfire, fuel wood, is likely the image that springs to mind when you think of firewood: logs cut down to a couple feet long and split into quarters. You can often buy pre cut fuel wood from campgrounds or other stores, but you can always gather and cut your own. Once your campfire is built and burning, you’ll use these logs to keep it going strong for as long as you need.
There are a few other basic rules that are important to follow while collecting firewood. Try to make sure all of your wood is dry, as it won’t burn very well if it’s wet. Avoid wood that’s still alive, or ‘green' because it also doesn’t burn as well as dead wood and it can produce a lot of smoke. Never cut down trees or cut off branches to use as firewood even when they’re already dead. Birds, insects, and other wildlife may have made their home in a dead tree that’s still standing. Finally, you never really know how much wood you’ll need, so it’s always a good idea to collect at least twice as much as you think is enough.
Now that you’ve got everything you need, it’s finally time to start building the fire!
See also Winter Campfires

How to Build a Campfire
All campfires begin the same way: with a tinder bundle. Clump together a couple of handfuls of tinder and mold it into a loosely packed bundle. Packing it too tightly will constrict air from flowing through it, and it won’t burn as well. This piece is very important—it’s the part you actually light to start your fire, so it needs to be well made.
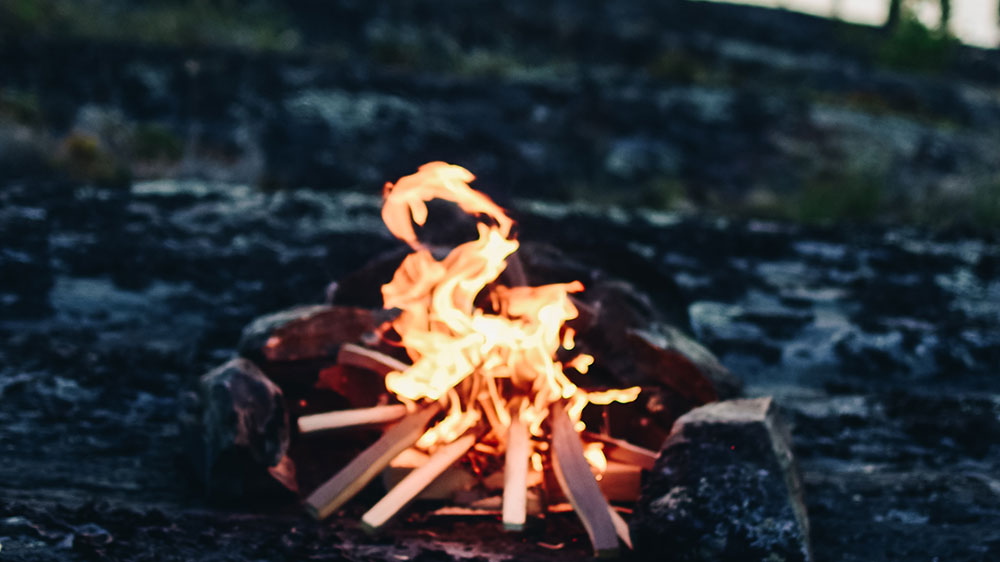
Building a Teepee
The most basic campfire lay is called the Teepee. It’s easy to build, and will burn steadily for as long as you keep adding fuel. To build a Teepee, first place the tinder bundle into the fire pit. Next, start building a tent shape above the tinder bundle by leaning small pieces of kindling against each other. Make sure to leave gaps so that air can reach your tinder, and leave a door to light the tinder when you’re ready. Add a few more layers to the Teepee with larger and larger kindling, and then you’ll be ready to light your campfire.
Simply reach in through the door you left and use your chosen fire starter to light the tinder bundle. Alternatively, you can slide the tinder bundle out through the door if you’re having trouble getting it to light on the inside. Light it outside the Teepee, then slide it right back through the door to where it came from. Finally, gently blow on the fledgling fire to help it grow.
The Teepee works by forcing the flames from the tinder upwards into the kindling, igniting the rest of the campfire. Because the Teepee is such a basic and reliable campfire lay, it is used to get things started for many other lays as well.
How to Maintain a Campfire
Now that you’ve got a campfire burning, you may think that it’s finally time to sit back and relax. You would be woefully wrong, though, as maintenance is an imperative aspect of campfire safety. Even with all of its wonderful uses, fire is still very dangerous and accidents can happen in an instant. It’s crucial to stay vigilant and never leave a campfire unattended. Also keep in mind to never leave children or pets alone with a campfire. Keep a watchful eye on the weather—a sudden change in wind speed and direction can prove disastrous.
As the initial Teepee burns, start adding larger and larger pieces of wood until your campfire is the size you want. Keep it small and under control, and add more fuel wood as necessary. Stick to only burning firewood, as putting things like bottles, cans, or trash in a fire can be dangerous. Keeping all that in mind, you can now safely enjoy the fruits of all your hard work and preparation.
See also Surviving a Wildfire

Extinguishing the Campfire
When it comes to upholding campfire safety, your job isn’t done until the very last embers of your extinguished fire are dead and cold. Properly extinguishing a campfire is perhaps the most critical step to safely building a campfire. Leaving behind any remains of a fire could prove cataclysmic—if your leftover hot embers get blown off into the forest, there may soon no longer be a forest. Make sure to be extremely thorough in this step. It takes time to do things right, so give yourself at least 20 minutes to extinguish your campfire before packing up and heading out or turning in for the night.
The best way to make sure your campfire is completely out is to let it burn all the way down to ash. If you’re pressed for time, though, you can start a bit early. Grab your bucket and slowly start pouring water into your fire pit. Be careful not to pour too much or too fast, as flooding a campfire will make it unusable. Next, take your shovel and use it to stir in dirt with your soupy, ashy, muddy mess of a fire pit. Once it’s nice and mixed up, hold your hand above the fire pit to feel if it’s still hot. If you feel any heat at all, grab your bucket and repeat the whole process. Don’t stop until your pit is completely cool.
Now that you know the basics, it’s time for you to get out there and build some campfires of your own. Keep these guidelines in mind and you can expect to enjoy warm, safe, and fun campfires for the rest of your days.