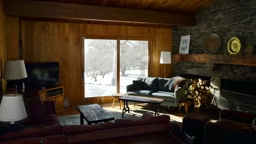
Installed and wired properly, ceiling fans increase heating and cooling efficiency while adding a touch of character to nondescript ceilings. They can also be a godsend for circulating the stale air that can accumulate at the cabin during long absences … or for dissipating the unique air quality issues that can arise while frying up a big batch of bacon for a cabin-full of Sunday morning guests.
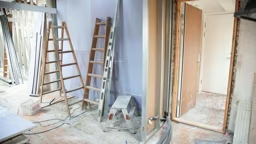
Routine ceiling fan installation can be fairly simple, but there are some common oversights that plague even experienced DIYers. Here are some tips for getting the most out of that great whirlybird in the sky.
No Strings Attached
The old fashioned fans with pull chains to adjust speed and light settings have no place in standard ceilings, much less cathedral or hard-to-access ceilings. If you’re installing a ceiling fan in a new construction setting, consider using an adjustable dimmer and fan speed wall switch.
The main obstacle to installing an adjustable switch is the electrical run: Standard lighting or fans require 12-2 wire, and adjustable switches require 12-3 wire (14-gauge wire can also be used). If you only have 12-2 wire available, consider installing a ceiling fan with remote control dimmer/ fan speed, which only requires standard 12-2 wire.
Avoid the Kamikaze Fan
Ceiling fans have an inherent amount of wobble. If a heavy fan (more than 35 pounds) is mounted improperly, there’s a good possibility your air circulation could come to a crashing halt.
On new construction this shouldn’t be a problem. Install bracing between truss sections (either a standard 2x4 or sliding metal bracing works fine) and then mount a ceiling fan-approved electrical box directly to the bracing. For remodeling work, you have two choices. Either access the fixture from the attic and add bracing from above, or consider buying or building a decorative square out of plywood (with trim), then fastening the plate directly to the ceiling. The square will have to be 24 inches wide to hit two trusses, with a cut-out to accommodate the fan wiring. You might need to substitute longer screws while securing the fan motor to the fixture box, since you’ve extended the depth by 1/2 to 3/4 inches.
To further reduce wobble, consider an oversized fan. This means you can circulate more air at a lower speed, which keeps the vibration to a minimum and also extends the electrical motor’s lifespan.
The Sadistic, Awful, but Beautiful Cathedral Ceiling
There’s no doubt cathedral ceilings look wonderful, adding character and space to the often less-than grand dimensions of the family cabin. If you want to see a truly beautiful sight, however, take a look at the carpenter’s and electrician’s faces when they finally climb off the scaffolding when the job is done.
Cathedral ceilings present numerous logistical problems for adding ceiling fans. The most obvious is the old square-peg-in-a-round-hole problem: ceiling fan bases are flat, and cathedral ceilings end in an inverted point. This means you’ll need to build a box that fits into that inverted point and has a flat base. Take your time to get a snug fit. The fan may need a down rod extension to give the blades enough room to spin.
There’s also the height issue. If you’re one of those lucky people who’ve never fallen off a ladder or roof, this might not seem like a big deal. For the rest of us, however, working up high isn’t much fun. The problem gets worse when you’re trying to attach a heavy ceiling fan above your head, which makes the whole ladder assembly – including yourself – top-heavy. This is the time to install the ceiling fan in pieces, which takes more time but reduces the odds of tipping over.
Which Way Should It Go?
Most of us know that ceiling fans should spin opposite ways in winter versus summer, distributing the low-laying air in a manner that increases heating and cooling efficiency. Instead of flipping a coin, just remember to watch your clock.
In the summer, fans should turn clockwise, creating a simple breeze. In the winter, they should run counter-clockwise, drawing warm, floor-bound air up and distributing it across the entire room.
The easiest way to remember this is to set your ceiling fans at the same time you adjust your clocks for daylight savings time. When you fall back an hour in November, flip the small switch on your ceiling fan base so the blades spin “back in time;” i.e., counterclockwise. In the spring you can leap forward on your wall clock, then jump on the stepladder to switch the fan forward in anticipation of warm days ahead.
Kurt Anderson is a freelance writer who has often been seen doing poor imitations of carpenters, electricians and plumbers. One of his greatest DIY thrills was grabbing onto a live wire while installing a ceiling fan.