After a wet-weather trek, who wants to have to reach down with cold fingers and wrench off a pair of slushy or muddy boots?
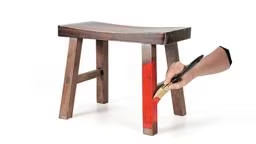
Build this bootjack and you’ll spare yourself some suffering. Just wedge a boot heel in the fork and slide your foot out. The weight of your free foot on the back of the bootjack provides the leverage. No contortions, no cursing.
This is a simple project that is made from just one ¾-inch board. The fork in the front of the bootjack is formed by first drilling a 1 ½-inch hole, then making two saw cuts from the hole to the front edge of the board.
A hole in the bootjack allows you to hang it near the doorway, so it’s close at hand whenever you need it. And at this time of year, that could be every time you walk inside.
1. Drill some holes
Mark for the two screws that will reinforce the dado joint, then drill the screw holes. The two screws (use 2-inch-long No. 10 brass flat-head screws) extend through the body of the bootjack and into the foot.
Now is also a good time to drill both the ¾-inch diameter hanging hole and the 1½-inch diameter fork hole. Drill both using Forstner bits. Use a backing board to prevent splintering when the drill bit exits the bootjack.

Photo Credit: Raj Chaudhry
A 1-1/2" diameter hole forms the radius for the bootjack's fork.
2. Cut the dado
Cut a rectangular groove (dado) in the bottom of the long board that will house the bootjack foot. Using a table saw equipped with an adjustable dado blade, cut the groove ¾-inch wide and ¼-inch deep. If you aren’t sure of your skills, make some test cuts in scrap wood until the bootjack foot fits snugly.

Photo Credit: Raj Chaudhry
Cutting a dado on the table saw. This groove will house the foot.
3. Shape the bootjack and cut the fork
Taper the edges of the bootjack, using either a bandsaw or a handsaw. If you are nervous about using a handsaw, a straight-edged board, clamped along the cut line, makes a simple guide. The bootjack itself tapers from 5 inches at the front to 4¼ inches at the back. (You can simplify the design by leaving the bootjack untapered. It may be a little less elegant, but it will be no less functional.)
Use the same saw to cut the fork. The saw cuts for the fork should extend from each tip, ½-inch from the outside edge, to a point that’s tangent to the 1½-inch diameter hole.

Photo Credit: Raj Chaudhry
Cutting out the fork on a bandsaw.
See also Caramel-Chocolate-Pecan Pie
4. Attach the foot and trim
Attach the foot to the top with screws. This is not a final assembly, so make the screws snug but not tight. If you don’t want to mar the brass screws, use steel screws for this step. In any case, a little beeswax or a commercially made screw lubricant will make the job of driving easier.With the foot screwed in place, trim the portions that extend beyond the edges of the bootjack. Use a fine point handsaw, such as a Japanese woodworking saw. Then disassemble the project.

Photo Credit: Raj Chaudhry
Using the tapered body of the bootjack as a guide, trim the foot to width. A Japanese-style handsaw is ideal for the task.
5. Cut the foot
To make the bootjack, start with a 3/4-inch thick hardwood board, 5 inches wide and at least 17 inches long. Both the body of the bootjack and its foot, or fulcrum, will be cut from this piece.
First, bevel one end of the board at about 12 degrees on your table saw. Then cut the foot (2¼ inches long) from this end and sand it thoroughly with 150 grit sandpaper.
6. Mark the holes
Trim the remaining board to its final length of 14 inches. Because the finished bootjack tapers slightly from front to back, it is easiest to mark a center line and lay out the two holes while the board is square. So do that now. Mark the centers of the 3/4-inch diameter hanging hole and the 1 1/2-inch diameter hole, which will form the radius for the fork.
See also DIY Copper Garden Tower
7. Reassemble
Use water-resistant woodworking glue and fresh screws. Keep a soft-faced mallet nearby, because glue can swell the wood, which sometimes makes joining the pieces a little sticky. After final assembly, check to make sure the foot rests flat. If not, fine-tune the bevel with medium grit sandpaper. (Tack the sandpaper to a flat surface and rub the bootjack over this until it sits flat.)
8. Sanding and finish
Smooth all the edges of the bootjack with sandpaper. Then sand all surfaces, beginning with a relatively coarse grit and work through progressively finer grits. Because of the hard use this piece will get, there’s really no need to sand beyond 150 grit. Remove sanding dust and wipe with a tack cloth.
Use several coats of an exterior-grade oil for the finish. Plan on refreshing the surface periodically. Polyurethane will offer better moisture resistance, but it also will make for a slick surface.
Project guy Raj Chaudhry recently filed for patents on a slipper jack and a pantyhose jack.