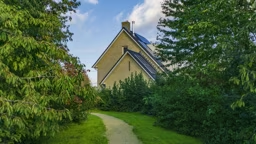
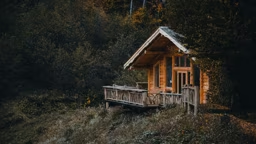
Those of us who live in northern climates enjoy and embrace the cold northern winters. We love winter. It doesn’t matter that we sometimes have to plug our cars into electrical outlets to ensure they will start. However, there are a few downfalls in our winter wonderland. One is the formation of ice dams, which are thick, continuous ridges of ice along a building’s eves that can do severe damage to roof systems. Cabin roofs have their own distinctive problems associated with winter cold, as many cabins were designed to be occupied for only three-seasons. Winter was not one of them.
The Making of an Ice Dam
Roofs can be constructed in many different ways, but it’s how the roof is insulated that is the culprit behind many ice dams. Ice dams also can be caused by air leaks from gaps around fixtures like vent pipes. Other problem areas are where rooflines intersect and at the juncture where the chimney and roof meet. Technically they are “caused by heat energy leaks through inadequately constructed building thermal and air barriers,” according to the National Roofing Contractors Association (NRCA). On warm winter days, melting snow should just form regular icicles or just drip off the eves. That’s how a properly insulated and ventilated roof would perform. There would be no concern to leaving the snow on your roof. However, where there is warm air leakage from the interior, the roof is heated, and snow melts.
You may see a bare spot on your roof while there is snow elsewhere on it. That’s from air leakage. When water formed by the air leakage flows down to the eves, which are not heated or ventilated, it freezes. As this cycle continues throughout the winter, more and more ice builds up, trapped water seeps under shingles and works its way into your cabin. (That may be how the brown blotch on your ceiling manifested – water damage from an ice dam.)

Fixing a Hot Mess
First, fix the reason for the freezing ice in the first place – the right way. Many cabin owners who try to insulate their cabin to make it a year-round retreat can get the roof insulation and ventilation process wrong, perpetuating the ice dam problem with no knowledge of why they continue to have trouble. Likewise, cabin owners who purchased a preowned retreat may have unwittingly bought themselves an ice dam problem, too – with no extra charge.
The number one cause of ice dams is poor roof design by an architect and/or poor roof construction by a contractor who didn’t know better or cut corners. When replacing your cabin’s roof, hire the best. The best roofers are ones who are versed in the International Building Code and the International Residential Code regarding ice-dam protection. They know how and where to put vents, baffles, insulation and “ice barriers,” which are a thick, code-specific underlayment.
As you consider DIY roof retrofit efforts for effective ice dam prevention, know that you are looking to accomplish three essential things: air sealing the ceiling plane, insulating the attic floor and providing balanced attic ventilation, according to the NRCA. Steps to do the job:
- Close the leaks in your attic. Lift up the insulation on your attic floor and use foam, caulk or other retardant products in any gaps.
- Check the depth of your attic insulation. You’ll need about 12 to 14 inches of fiberglass or cellulose.
- Add roof and soffit vents. A best practice is to put an 8x16-inch vent in the underside of the soffit in every other rafter space.
- Also install a continuous ridge vent along the peak. You’re looking to have a minimum of 1 square foot of vent per 300 square feet of attic floor.
This is a basic overview. There are many nuances to the actual job. Visit the NRCA website for resources, like the “Do-It-Yourself Guide to Sealing and Insulating with Energy Star,” or the Building Science Corporation’s “Dam Ice Dam.”

A Disappearing Act
If you are not able to head off the potential problem and do get ice dams, there are several DIY ice-removal methods. However, be warned: “For safety reasons, NRCA generally does not recommend homeowners attempt to remove ice dams or shovel snow off roofs because homeowners may cause more harm than good in some instances.” Although you may consider the following ideas, know that there are potential pitfalls of DIY snow/ice removal from roofs.
- Buy a snow rake and remove any snowfall at least two to three feet from the eves back up the exterior roofline toward the ridge. Be careful not to bury yourself.
- Install top-quality electric heat cables or heat-traced tape on roofs to prevent snow buildup. Consider ordering directly from a reputable company like Heat-line where you can talk to a knowledgable salesperson. You may want to avoid inexpensive cables or tape available at big-box stores. A downside of cables and tape: You can’t remove snow from the roof’s edge with a snow rake.
- Hammer the ice into small chunks with a blunt mallet. Be careful not to take away shingles or other roof parts and be prepared to be there awhile. It’s a slow process.
- Remove gutters for winter. For most of us, that’s not an option, so just be sure gutters have a positive slope to drain. And, gutters and downspouts should be cleared of debris before winter.
- Consider replacing your roof with a metal roof that sheds snow more efficiently. If you do, be wary that built-up snow may slide down avalanche style. To help prevent that, a variety of snow retention products are available like Ice Stoppers and Snobar Rails from SnoBlox-Snojax.
- Consider potential environmental consequences if you choose to use an ice melt product that has calcium chloride or magnesium chloride.
DO NOT
- Use ice picks, shovels or axes in an attempt to dislodge the ice. You will damage the shingles and have an expensive roofing bill in the spring.
- Hose down the roof with running water. Again, leave it to the professionals.
- Get up on a ladder to use a hot air gun or hair dryer. You’ll only put yourself in harm’s way.
- Use rock salt, which can damage paint, metals and plants.
Did you know there is a National Snow & Ice Data Center? Learn all about snow and ice, plus find facts about big snowstorms.
About our author Steven Umland is an experienced cabin owner and DIY guy in snowy northern Wisconsin. (Copyeditor Gina Chiodi Grensing also contributed to this article.)