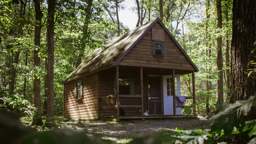
“Don't forget to water the plants when you get there,” my mom reminds me, as we wrap up our phone conversation on my way to the family cabin. “They haven’t been watered since last Friday when your Aunt Sharon was there.” It was one less thing on my mom’s daily worry list and one more on mine.
When I arrive, petunias and impatiens wilting in their tiny homes greet me. They are anxiously awaiting a drink in 8x8-inch wobbly-legged planter boxes, old teakettles and Italian clay pots (cute containers, but not very practical when it comes to cabin gardening and infrequent watering by sometimes forgetful cabin visitors). A wave of responsibility overrides my impulse to unwind with a glass of Syrah on the dock. Water plants first. Relax and enjoy North Woods calm later.
Those old planters and pots have been at the cabin as long as I can remember. So long, in fact, that we never thought there could be a better way to enhance our beloved cabin with plants that we love.
Of course there is a better way. Sometimes we just need to step back from our traditional cabin routines.
Bigger homes for those plants would allow for more soil; more soil would allow for moisture to be maintained longer; longer moisture maintenance would result in less needy plants. Bigger planters in contact with the surface of the soil put roots in direct contact with water and nutrients never available within the confines of Grandma’s old aluminum teakettle. Time to enlist my Uncle Tony, who is adept with the mysteries of dimensional lumber, to construct a raised bed.
Raised beds are becoming increasingly popular given the recent surge in backyard gardening, and they are a practical, do-it-yourself solution if you want a relatively sustainable garden at your cabin. In addition to maintaining soil moisture for a longer period of time (versus small pot gardening), raised beds also prevent soil compaction (because you’re never walking in the garden), allow you to keep good garden soil in place, and reduce back strain, especially if you use a design with a wide top rail on the outside edge to sit on. Given the many no-tools-required kits available, you can tackle this project even if you don’t have an Uncle Tony in your back pocket.
The following steps will put fresh tomatoes on your burgers by the end of July.

The Benefits
Raised garden beds are great DIY projects for the cabin yard. They help maintain moisture in the soil, prevent soil compaction, keep soil in place, and reduce back strain on you.See also DIY Copper Garden Tower
1. Follow the sun.
Review your cabin yard as if you were looking at it for the very first time. For many of us who’ve been making the cabin trek for 20 years or more, you don’t “see” the details of your space anymore. Find a fairly flat, sunny spot preferably near your cabin or a walkway, so watering, weeding and harvesting is easy. Sunny means more than five hours of sun per day during the summer months and unlimited options for annual edibles and flowers. If shade is the only option that you have, that’s fine too; you’ll just need to focus on shade-loving plant choices.
2. Keep it simple! Find a raised-bed kit that matches your space.
There are many reputable companies that provide durable kits that can be constructed in minutes. Naturalyards offers rectangle-, hexagon- or octagon-shaped beds. They’re comprised of stacked cedar boards treated with nontoxic waterproof sealants and anchored with corner pins, so construction tools are not needed. Sizes vary from 2- to 4-foot widths by 2- to 4-foot lengths by 11- to 22-inch heights.
Although these beds are really sturdy just sitting on the ground, filled with topsoil (especially in a sheltered location), you may wish to strengthen them even more by adding the following:
Although these beds are really sturdy just sitting on the ground, filled with topsoil (especially in a sheltered location), you may wish to strengthen them even more by adding the following:
- Screws to the corners.
- Corner posts cut 10 inches higher than the height of your bed so you can sink them 10 inches into the ground.
- Cross supports every 6 feet (if you have a long bed) to prevent side boards from bowing.
3. Flag the bed boundaries and double dig the soil.
Use spray paint or flagging to mark the boundaries of your bed on the ground. Loosen up the future root zone of the soil by “double digging,” a fancy term for removing the topsoil the depth of a spade, setting this soil aside, loosening the subsoil another spade’s depth, then finally returning the topsoil back from where it came.
Prior to returning the topsoil, you may wish to augment with composted leaf mulch or manure if your soil is lacking nutrients. When in doubt, consult a local landscaping or garden pro to help you with the “what” and “how much” of soil augmentation so you have the perfect home for your future plants.
Prior to returning the topsoil, you may wish to augment with composted leaf mulch or manure if your soil is lacking nutrients. When in doubt, consult a local landscaping or garden pro to help you with the “what” and “how much” of soil augmentation so you have the perfect home for your future plants.
See also Your Seasonal Garden Checklist
4. Anchor the bed to the ground and fill it up … after a quick calculation.
Assemble your raised bed within the confines of your marked boundaries, taking care to keep it level. In fact, break out the level (or borrow your uncle’s) just to make sure.
Once completed, figure out how much topsoil (sold as yards) you’ll need by multiplying the length of your bed by the width and then by the height. Remember to keep your measurement units consistent.
For example, if you have a 4x6-foot bed that is 11 inches high, your topsoil calculation is as follows:
- Convert 11 inches to feet by dividing 11 by 12, as there are 12 inches in 1 foot. This equals 0.92 feet.
- Now that all your units are the same, multiply width by length by height to get cubic feet. 4x6x0.92=22.08 cubic feet.
- Convert cubic feet to cubic yards by dividing your cubic foot measurement by 27, as there are 27 cubic feet in one cubic yard. 22.08/27=0.82 cubic yards (in the landscaping industry, they just say “yards”).
So for this example, you’ll need just under a yard of topsoil to fill your raised bed.
If practical, check your topsoil source prior to purchase to make sure it doesn’t have a million quack grass roots mixed throughout. Your topsoil should be screened and free of live plant roots.
5. Add some bling.
Customize your bed by adding corner brackets (which also add stability), wood or wrought iron trellises for plants that love to roam, and wide top rails if you feel like resting a spell while you weed. Add a length of soaker hose to provide fresh water at ground level and to minimize moisture loss to the atmosphere.
See also 4 Hot Accessories for Your Porch
6. Check your zone.
Do an Internet search for “plant hardiness zones” and create your own wish list of your favorite plants that are hardy to your zone. Stick with annual flowers and edibles if you don’t want to worry about mulching to protect tender roots over the winter. And remember, have fun with your new topsoil box! Mix scarlet runner beans with Mrs. Burns lemon basil, Cherokee purple tomatoes with Bull’s Blood beets, and throw in a drift of Titan sunflowers for good measure. (Seed-eating goldfinches will appreciate the sunflower seeds during the late summer and fall.)7. Reap the rewards.
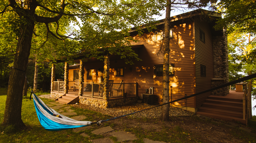
Next time you’re hauling your weekend gear into the cabin, stop and grab a tomato from your beautifully constructed raised bed on your way. You’ve got to love being greeted by fruit instead of wilting flowers! And, your glass of Syrah will still be waiting for you on the dock.
Jennifer Baker is the owner of Sparrow Land Planning.
Jennifer Baker is the owner of Sparrow Land Planning.