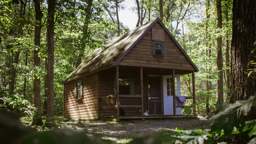
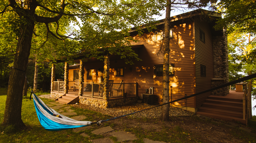
When it comes to high-impact areas around the cabin, there’s little doubt that decking is the scuffed-up punching bag of the place. Exposed to heavy foot traffic, temperature extremes and nearly constant exposure to moisture, even highly maintained wooden decking boards eventually take on damage.
When composite decking (so named because the material consists of a polyethylene resin combined with organic filler, such as wood flour) burst onto the scene 20 years ago, there was a general feeling that these were the boards of the future. Designed to be highly resistant to the elements, composite boards were a “lifetime” solution, with warranties promising years beyond the normal lifespan of green-treated or cedar decking.
Like any new product, composite decking has taken its lumps since then. But today’s quality composite boards, properly installed, are an excellent choice for high-use decks. By carefully choosing the right board, and using the right installation techniques, you can replace those cracked and weathered boards with a low-maintenance, durable and beautiful new surface – all in the course of a weekend.
Removal of Existing Decking
If your deck is low to the ground, you can go ahead and remove the entire decking at once. For elevated decks, it’s usually best to remove a few rows of decking at a time, giving yourself a platform to work on when you install the new composite boards.
Often, the first board (flush against the cabin) will be the most difficult to remove. Be careful not to damage the flashing, as a damaged or missing deck flashing can quickly cause rot along the deck’s interface with the cabin rim joist, subjecting your deck to the risk of collapse. If your deck was constructed without flashing, now is a perfect time to install this vital weatherproofing item.
If some of the decking screws are stripped, remove as many as possible from each board, and then use a crowbar or flat bar against the joist to pry the decking free. The screw(s) will often still be embedded in the joist, so simply tap it sideways with a hammer until it breaks off, usually at about the 90-degree angle. The broken stud remaining in the joist can then be hammered into the wood.
Prepping
If you’re able to remove the entire section of old decking at one time, now is a perfect time to get rid of any sags or bumps in the decking surface. Oftentimes, the joists can become warped, resulting in mild hills or valleys. With the decking removed, run a long (4- or 6-foot) level along the joists, checking for depressions or bulges.
Downward sags are easily corrected by screwing in an adjacent joist; you’ll simply use the new, straight joist to secure the decking. For “hilly” joists, snap a chalk line along the entire length of the joist. The offending bulge will then be clearly delineated, and you can use a plane or sander to bring it back down to level.
Now take a few more minutes to check the deck frame for overall level and square. Any adjustments are much easier with the decking removed, mainly because your deck is now significantly lighter and easier to manipulate. To square up your deck frame, use a carpenter’s square on each corner, and then measure the diagonals. Minor discrepancies can be worked around when installing the decking, but a seriously off-square frame will make installation of the decking much trickier. For larger, heavier decks, you may need a few friends and some icy-cold bribes to adjust the frame back onto center.
Also consider adding additional joists if you have 24-inch spacing, as some composite boards require 16-inch or less spacing for structural reasons.
Additional joists and supports will be needed if you plan on adding heavy items (e.g., a hot tub). For low-lying decks with minimal venting underneath, install a few rim joist vents to increase airflow and prevent moisture-induced discoloration or damage.
This is also the point where you will need to decide if you are going to install a composite railing. For weathered wooden decks, it makes sense to do a complete revamp of the exterior components, as a faded or banged-up railing can often look out of place with the smooth, clean look of new composite decking. Make this decision before you lay out the decking, as different railing systems require different prep work. The outside rim joist, which will have seen its share of sunrises and sunsets, can be easily covered up with a composite fascia board. However, this adds width to the framing, so it should be added prior to the decking.
2. Install your first board under the flashing at the cabin/deck interface. Secure the cabin-side edge of the board using a composite screw (Photo B), leaving at least a ¼-inch gap between the board and the cabin wall (use a spacer to ensure consistent gapping).
3. With the first board secured on one edge by a decking screw, install a hidden fastener at each joist (Photo D). Slide the next board in, tapping into place if necessary. Install boards with enough overlap over the decking frame (and fascia board, if installed), but it’s not necessary to match the ends up exactly flush.
4. The edge of the next board fits (for grooved decking) or is tapped (for solid-edge decking), into the other side of this fastener. If there are not built-in gaps in the fastener, just use some 16-penny nails or carpenters pencils as gap material.
5. Determine the combined widths of the boards, plus the anticipated width of the gaps, and compare that to the width of the deck frame. Take a few minutes and a calculator and adjust your spacing so that the final deck board will have no more than 25 percent of the total width hanging over the end of the outside, or rim joist.
6. If you are using solid-edge decking with fasteners that require tapping, it is imperative you apply downward pressure to ensure there is no space between the bottom of the board and the top of the joist. Simply place a boot on the decking to force it down onto the joist while tapping it into place.
7. Work your way out to the edge of the deck, taking care to install each board with the proper gapping.
8. Work around any existing rails using standard construction techniques. Simply lay the board next to the railing posts, mark the edges with a speed square, and add a ¼-inch gap to allow for expansion and contraction (use a jigsaw for this cutting).
9. Screw the outside edge of the final board to the rim joist with a composite decking screw.
Installation
The basic principles of composite board installation are very similar to those of wood decking, with a few small, but important, differences:
• Certain types of composite decking will wander more than a rigid 2x6-inch deck board when you lay it out, so pay special attention to your spacers during installation.
• Use a carbide-tipped blade on your circular saw, with a minimum of 40 blade-teeth.
• Use carbide-tipped drills to bore pilot holes prior to installing screws.
• Avoid traditional tapered (or bugle-head) screws, which will cause a mushrooming effect on the composite deck surface. (See Photo C)
• Whether you use screws or hidden fasteners, ensure the material is compatible with your type of composite decking. Stainless steel is a can’t-miss choice. Otherwise, your decking manufacturer will be able to provide a short list of acceptable fastener materials.
• Hidden fasteners are by far the most elegant way to secure your decking. Anchored into the side of the decking instead of the top, hidden fasteners eliminate marring on the surface and allow a relatively painless flop if you use reversible composite decking. Some fasteners even have built-in spacing, which makes gapping your boards almost error-proof.
The rest of this article will focus on installation using hidden fasteners; screws can be used to secure the decking via convention methods as well.
1. When determining the length of the decking boards required for your project, remember to take into account that fascia boards add width to the decking frame (Photo A).
10. We’re almost done, with only the ends of the deck remaining. Determine your desired overhang, mark on each end and then snap a chalk-line (Photo E). For a factory-quality edge, clamp or temporarily screw a guide board to the decking, which will butt against the fence on your circular saw.
11. If you used hollow decking, install end caps now. For solid boards, you can sand the edge of the board for a rounded appearance. If any of the screws created a mushroom bulge, sand those flat at the same time.
Maintenance
The manufacturer will have information regarding the proper cleaning materials and procedures, but composite decking is largely resistant to traditional stains and weathering. So go ahead, get the deck furniture out, and enjoy the start of a long, relaxing relationship with your new deck.
Frequent contributor Kurt Anderson has spent long hours building – and enjoying – decks for both his primary home and his cabin.
Decking Material Comparison
Decking choices abound, and any of the following will give you many years of functional use. But before you start installing boards, consider the following costs and maintenance issues associated with each type.
Decking choices abound, and any of the following will give you many years of functional use. But before you start installing boards, consider the following costs and maintenance issues associated with each type.
Deck Design Tips: Are you thinking about totally rebuilding your deck from the ground up? Here are a few tips:
• Think big, so you and your guests will have elbow room.
• If you entertain a lot, design nooks and corners to encourage small groups of people to congregate.
• Cut 45-degree angles into a few corners to add visual interest.
• Think big, so you and your guests will have elbow room.
• If you entertain a lot, design nooks and corners to encourage small groups of people to congregate.
• Cut 45-degree angles into a few corners to add visual interest.